Artisan bread

This last couple of weeks, I’ve been making bread.

Not your common or garden bloomer loaf, either. I’ve been experimenting and been making olive and sun-dried tomato bread. And it’s lush!

Here’s how…

Put 500g of strong bread flour into a bowl, with 7g salt, 7g easy bake yeast and two tablespoons of olive oil. We keep a bottle on the side with rosemary and garlic in – I use that to give it an extra depth of flavour. Add to that chopped black olives and chopped sun-dried tomatoes. I put about a handful of each in, but it’s down to your own taste.

Add warm water until the dough comes together. This needs to be not too wet, and not too dry. Knead (either by hand or in a stand mixer with the dough hook), for about 10 minutes, or until the dough is nice and elasticy (is that even a word???).

Form the dough into a ball, drizzle a little oil to coat the dough. Cover the bowl with cling film (Top Tip – shower caps that you get in hotels are brilliant for this!). Put the bowl in a warm place and leave for an hour or two – until the dough has doubled in size.

Once that’s happened, knock the dough back, taking all the air out. Give it a quick knead, and form into a bread-like shape. Put this on a baking tray lined with greaseproof paper, and put the whole thing inside a plastic bag. Leave again to prove, and the bread will double in size once more.

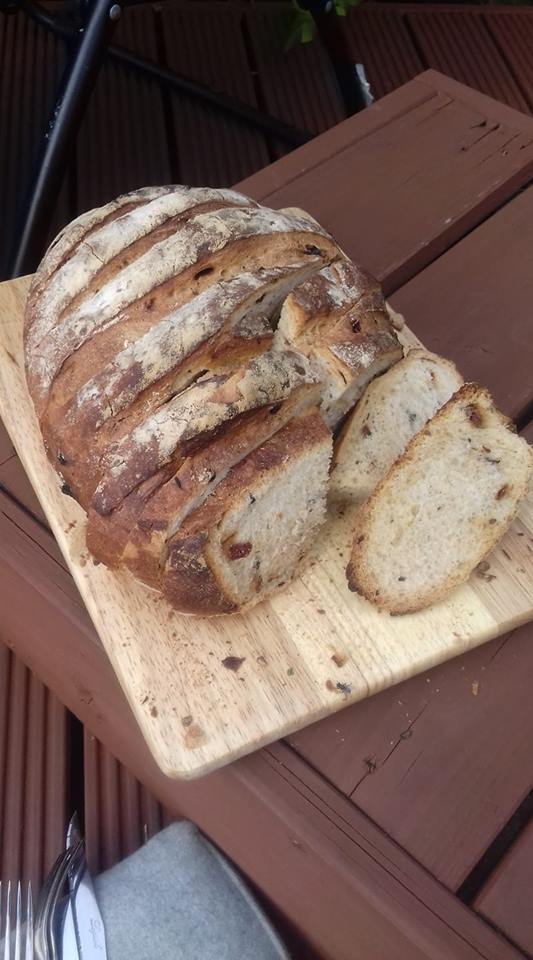
sundried tomato and olive bread

sundried tomato and olive bread

When that’s happened, sprinkle the loaf with water and dust with flour. Score the top with a couple of slash marks. This allows the bread to grow even more, and as an added bonus, looks rustic.

Preheat your oven to 220 degrees, and put a tray of water on the oven floor. This will create steam, which helps make a lovely crust.

Pop your loaf in the oven for about 25 minutes, or until nice and brown. Turn the oven down to 180 degrees and bake for a further 20 minutes. You’ll know when the bread is done – knock on its base – it should sound nice and hollow.

Let the bread cool down on a wire rack, and you’re good to go. I warn you… this is very moreish!

sundried tomato and olive bread

sundried tomato and olive bread

Rhubarb wine part 3

So… the wine has been blobbing away in the demijohn, turning all that yeast and sugar into lovely alcohol. It slowed down a bit, which I gather is normal, but at the weekend, disaster struck. The wine stopped fermenting!

Now I’m no expert, but I’m pretty sure that the process isn’t complete – it’s not been in there three weeks. In a slightly mild panic, I decided to consult Dr Google. The word on the street is that the wine is ‘stuck’ (boo!), but it is entirely possible to kick start it again (hurrah!).

To do this, I took about a cup full of the wine out, and added some sugar, a sachet of yeast and a 1/4 teaspoon of yeast nutrient. Before I added these magic ingredients, I had a sneaky slurp to see what I was up against. To my absolute surprise – and I don’t know what I was expecting – it tasted of wine and the rhubarb notes were coming through. (Hark at me – I’ll be swilling it round and spitting it out next – actually I WON’T – what a total waste!)

The wine and yeast starter will sit on the kitchen worktop until it’s fermenting well. At that point I’ll reintroduce it to the mother ship in the demijohn.

Fingers are well and truly crossed!

Rhubarb wine part 1 and part 2 also available…

Rhubarb wine part 2

After the rhubarb and sugar mixture had chance to stew for a couple of days in the fermenting bucket, it was time to work some magic on it, and start the process of turning it into wine. I whizzed the rhubarb and sugar with the hand blender until it was nice and pulpy. This then needed to be strained to separate the syrupy liquid.

Rummaging around in the pantry, I located the muslin straining cloth (aka an old net curtain, if we’re being specific), and poured the mixture in, to strain into a new container.

The liquid was then poured into a sterilised demijohn, to which I added 220ml white wine concentrate, one yeast sachet and a teaspoon of yeast nutrient. I then topped up the demijohn with warm (not hot) water, and fitted an airlock.

Surprised at how simple the whole process had been, and looking forward to sampling the results later in the year, I watched with anticipation. Within minutes, the airlock started to blob, meaning that the yeast was becoming active and the fermenting process had begun. It doesn’t look very tasty at the moment, but this should improve as the fermentation progresses.

Rhubarb wine

Rhubarb wine

Happy with that 🙂

Rhubarb wine part 1

I know it’s been a while since I’ve posted, but it’s all been mega busy here at Chook Cottage. What, with finishing the book, juggling work, training for my 5k inflatable run (which, by the way I’m super excited about – what fun!) – AND tending the garden – time has been a tad stretched to say the least.

But… I’ve managed to grab a couple of minutes to tell you about our latest project. We have a rhubarb plant in the garden which, I have to say, has gone a bit bananas. All through the summer, we get a prolific supply of the stuff, and I’m always on the lookout for new ways to use it up.

Last year I made rhubarb gin (lovely!), rhubarb vodka (equally as yummy!), rhubarb jam, rhubarb and ginger chutney – as well as the usual crumbles and pies.

Rustling around the internet for some new ideas, I came across a recipe for rhubarb wine. Well, we like wine and we like rhubarb… what could possibly go wrong?

Gathering together our hit and miss collection of winemaking equipment, I located a fermenting bucket, an airlock and a demijohn. The demijohn is currently on the patio full of fairy lights, but that can soon be sorted.

Following the recipe, I put 1.5kg of rhubarb in the sterilised bucket, along with 1.3kg of sugar. This has to be left for three days, so that’s currently in the pantry stewing. Once that bit’s done I’ll have to mash it up to extract as much juice as I can, then strain it, ready for the exciting fermenting stage.

I’ll keep you informed!

Cheese and parma pastries

Last weekend, lovely chap got out of bed, wandered off downstairs, and I lay there looking forward to tea being delivered very shortly.

He was gone absolutely ages! Finally, he returned upstairs.

“Where have you been?” I asked

“I’ve been busy”, was the reply. “I’ve put all the washing out, tidied around, made tea, and I’ve made you these”.

He’d used up a bit of leftover puff pastry that had been lurking in the fridge and wrapped this around some cheese and parma ham.

Top start to the weekend!

Cheese and parma ham pastries

Cheese and parma ham pastries

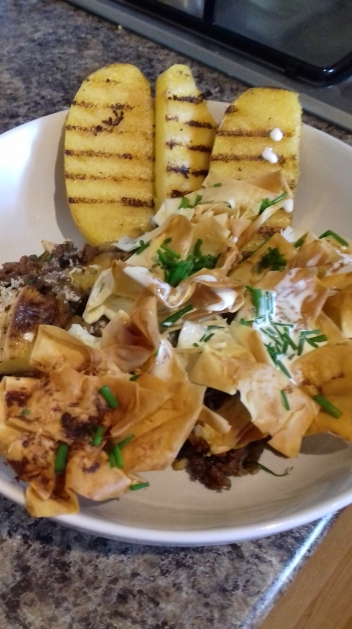
Filo cottage pie with grilled polenta

We had some leftover roast carrots and parsnips, a roll of cheap filo pastry we found in the reduced, and a slab of polenta… what can you do with that little lot?

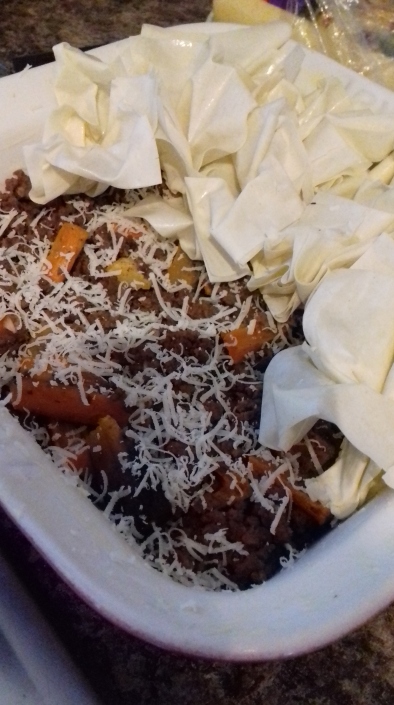
First, we fried off some frozen beef mince (so much more value than fresh, but that’s just my opinion), added the leftover veggies, transferred to an ovenproof dish and scattered a light dusting of parmesan cheese over the top.

Filo cottage pie with griddled polenta

Filo cottage pie with griddled polenta

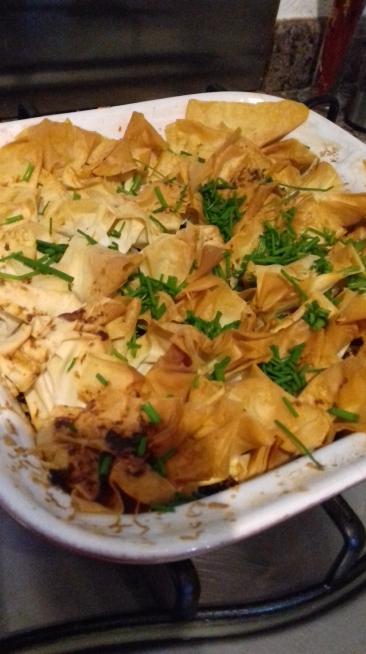
Then, we melted some butter and brushed this over one sheet of pastry. Another sheet was added and this too was brushed with butter. The two sheets were then cut into six equal (ish) parts. Each of these was pushed and twisted in the middle to make flower-like shapes, and laid on the top. The whole thing was baked at 180 degrees for about half an hour (or until the pastry is nice and brown and crunchy).

Last of all we sliced some polenta, seasoned with a little salt and pepper, and griddled in a hot pan to get the lovely scorch marks. A sprinkling of fresh chives finished it off nicely.

Filo cottage pie with griddled polenta

Filo cottage pie with griddled polenta

Verdict? Scrummy!

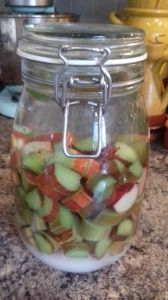
Rhubarb vodka

Flavoured vodka isn’t all that common in the UK, so with the first crop of rhubarb ready in the plot, I decided to make my own. I made some last year, and it’s ridiculously simple for such a lovely end product.

Rhubarb vodka ingredients


You’ll need:
1 litre of vodka – any cheap stuff will do – but this was on offer this week
5 sticks of washed rhubarb
1 cup of sugar
Large Kilner jar

Chop up the rhubarb and add to the jar. Add the sugar and vodka and seal. Give it a good old shake to agitate, then pop it in a cupboard out of the way. Every now and then, give the jar a gentle shake to keep mixing the flavours.

Rhubarb vodka

Rhubarb vodka

In about 2 to 3 months, it will be ready. At that stage, drain the liquid through a sieve and decant back into the empty bottle (which you saved). You will be rewarded with a beautifully smooth, slightly syrupy, pink liqueur.

Lush!

Chicken and leek pie

We still had a handful of leftover chicken to use up… we throw NOTHING away food-wise!

Today I decided to send it out in style, by transforming it into a chicken and leek pie… so simple, but so delicious.

First up, I heated a little oil and butter in a pan and tossed in two cloves of finely chopped garlic. I added a couple of sliced leeks and a good glug of white wine. After the wine had cooked off, I added a good glug of cream and the leftover chicken. We also had a handful of leftover onions and roasted purple sprouting broccoli from the weekend, so that all went in too. Once warm, I spooned the mixture into a pyrex dish, rolled out some puff pastry and made a lid. This I brushed with beaten egg so it will go lovely and brown.

I then cooked for about 35 minutes at 180 – just until the lid had puffed up and was brown.

Verdict? Delicious!20170412_120832[1]

Sesame chicken and warm salad

The weather was blooming gorgeous this weekend, so as the garden is looking so good at the moment, we had an impromptu barbeque. The tripod barbeque came out of hiding and we proudly set it up on the decking, along with chairs for our guests and outside table laden with condiments, cutlery and the family favourite: spinach and water chestnut dip.

The menu was simple: a couple of chickens started off in the oven and finished on the barbeque, sausages and onions cooked in a pan outside. In addition, we served roasted purple sprouting broccoli in garlic and a huge salad. The food went down a storm, our guests had a great time, and we congratulated ourselves on turning a party around with a moment’s notice.

After everyone had gone, we had leftovers. A large tub of salad and another of chicken. The chicken went into a couple of sandwiches for lunch, but last night we wanted to use it up… and this is where the good bit happened!

The majority of chicken was heated up in a pan with some garam masala and a good spoon of sesame seeds (there’s still a handful of chicken left, but we’ll come to that in a later post). The baby gem lettuce leaves were griddled in the griddle pan so they were slightly wilted but with scorch lines across them. Next, the leftover sliced radish, cucumber and cherry tomatoes were tossed around a pan with some chopped garlic so they were warm but still had a crunch. The whole lot was tossed into a bowl and we tucked in. A sprinkle of coriander leaves and the dish was complete. The verdict? Absolutely blinking delicious – warm salad is so tasty!

Sesame chicken and warm salad

Sesame chicken and warm salad

Spinach and water chestnut dip

This is a really easy dish that goes down a storm at gatherings. The dip is made and served in a hollowed out bloomer loaf. Guests then eat the dip with the bread, cutting or tearing the loaf until there is none left.

Ingredients
approx 300g frozen spinach
1 cup mayonnaise
1 cup soured cream
1 small tin of water chestnuts (finely chopped)
3 spring onions (finely chopped)
1 vegetable stock cube (crumbling variety)
Small bloomer loaf

Defrost and drain the spinach – squeeze out as much moisture as you can. Chop up the spinach so that it comes apart easily in the dip.

Add the mayonnaise, soured cream, water chestnuts, spring onions to a bowl and stir together. Crumble in the stock cube and stir again. Add the spinach and mix well. Refrigerate for a couple of hours to allow the flavours to blend together.

Cut the middle from the loaf, and take out the excess bread – you should be left with the shape of a bowl. Put the spinach into the bread, slice up the excess bread into chunks and arrange these around the side.

A guaranteed showstopper at parties 🙂